> ## Documentation Index
> Fetch the complete documentation index at: https://docs.rhinestone.dev/llms.txt
> Use this file to discover all available pages before exploring further.
# Dashboard
> Access the Rhinestone Dashboard and manage projects, credentials, and team access.
Use the [Rhinestone Dashboard](https://dashboard.rhinestone.dev) to monitor your integration and manage project credentials, sponsorship, app fees, and organization access.
## Sign in and choose a project
Dashboard access is invite-gated.
Enter your invite code on the sign-in page. If you do not have one, select **Request access**.
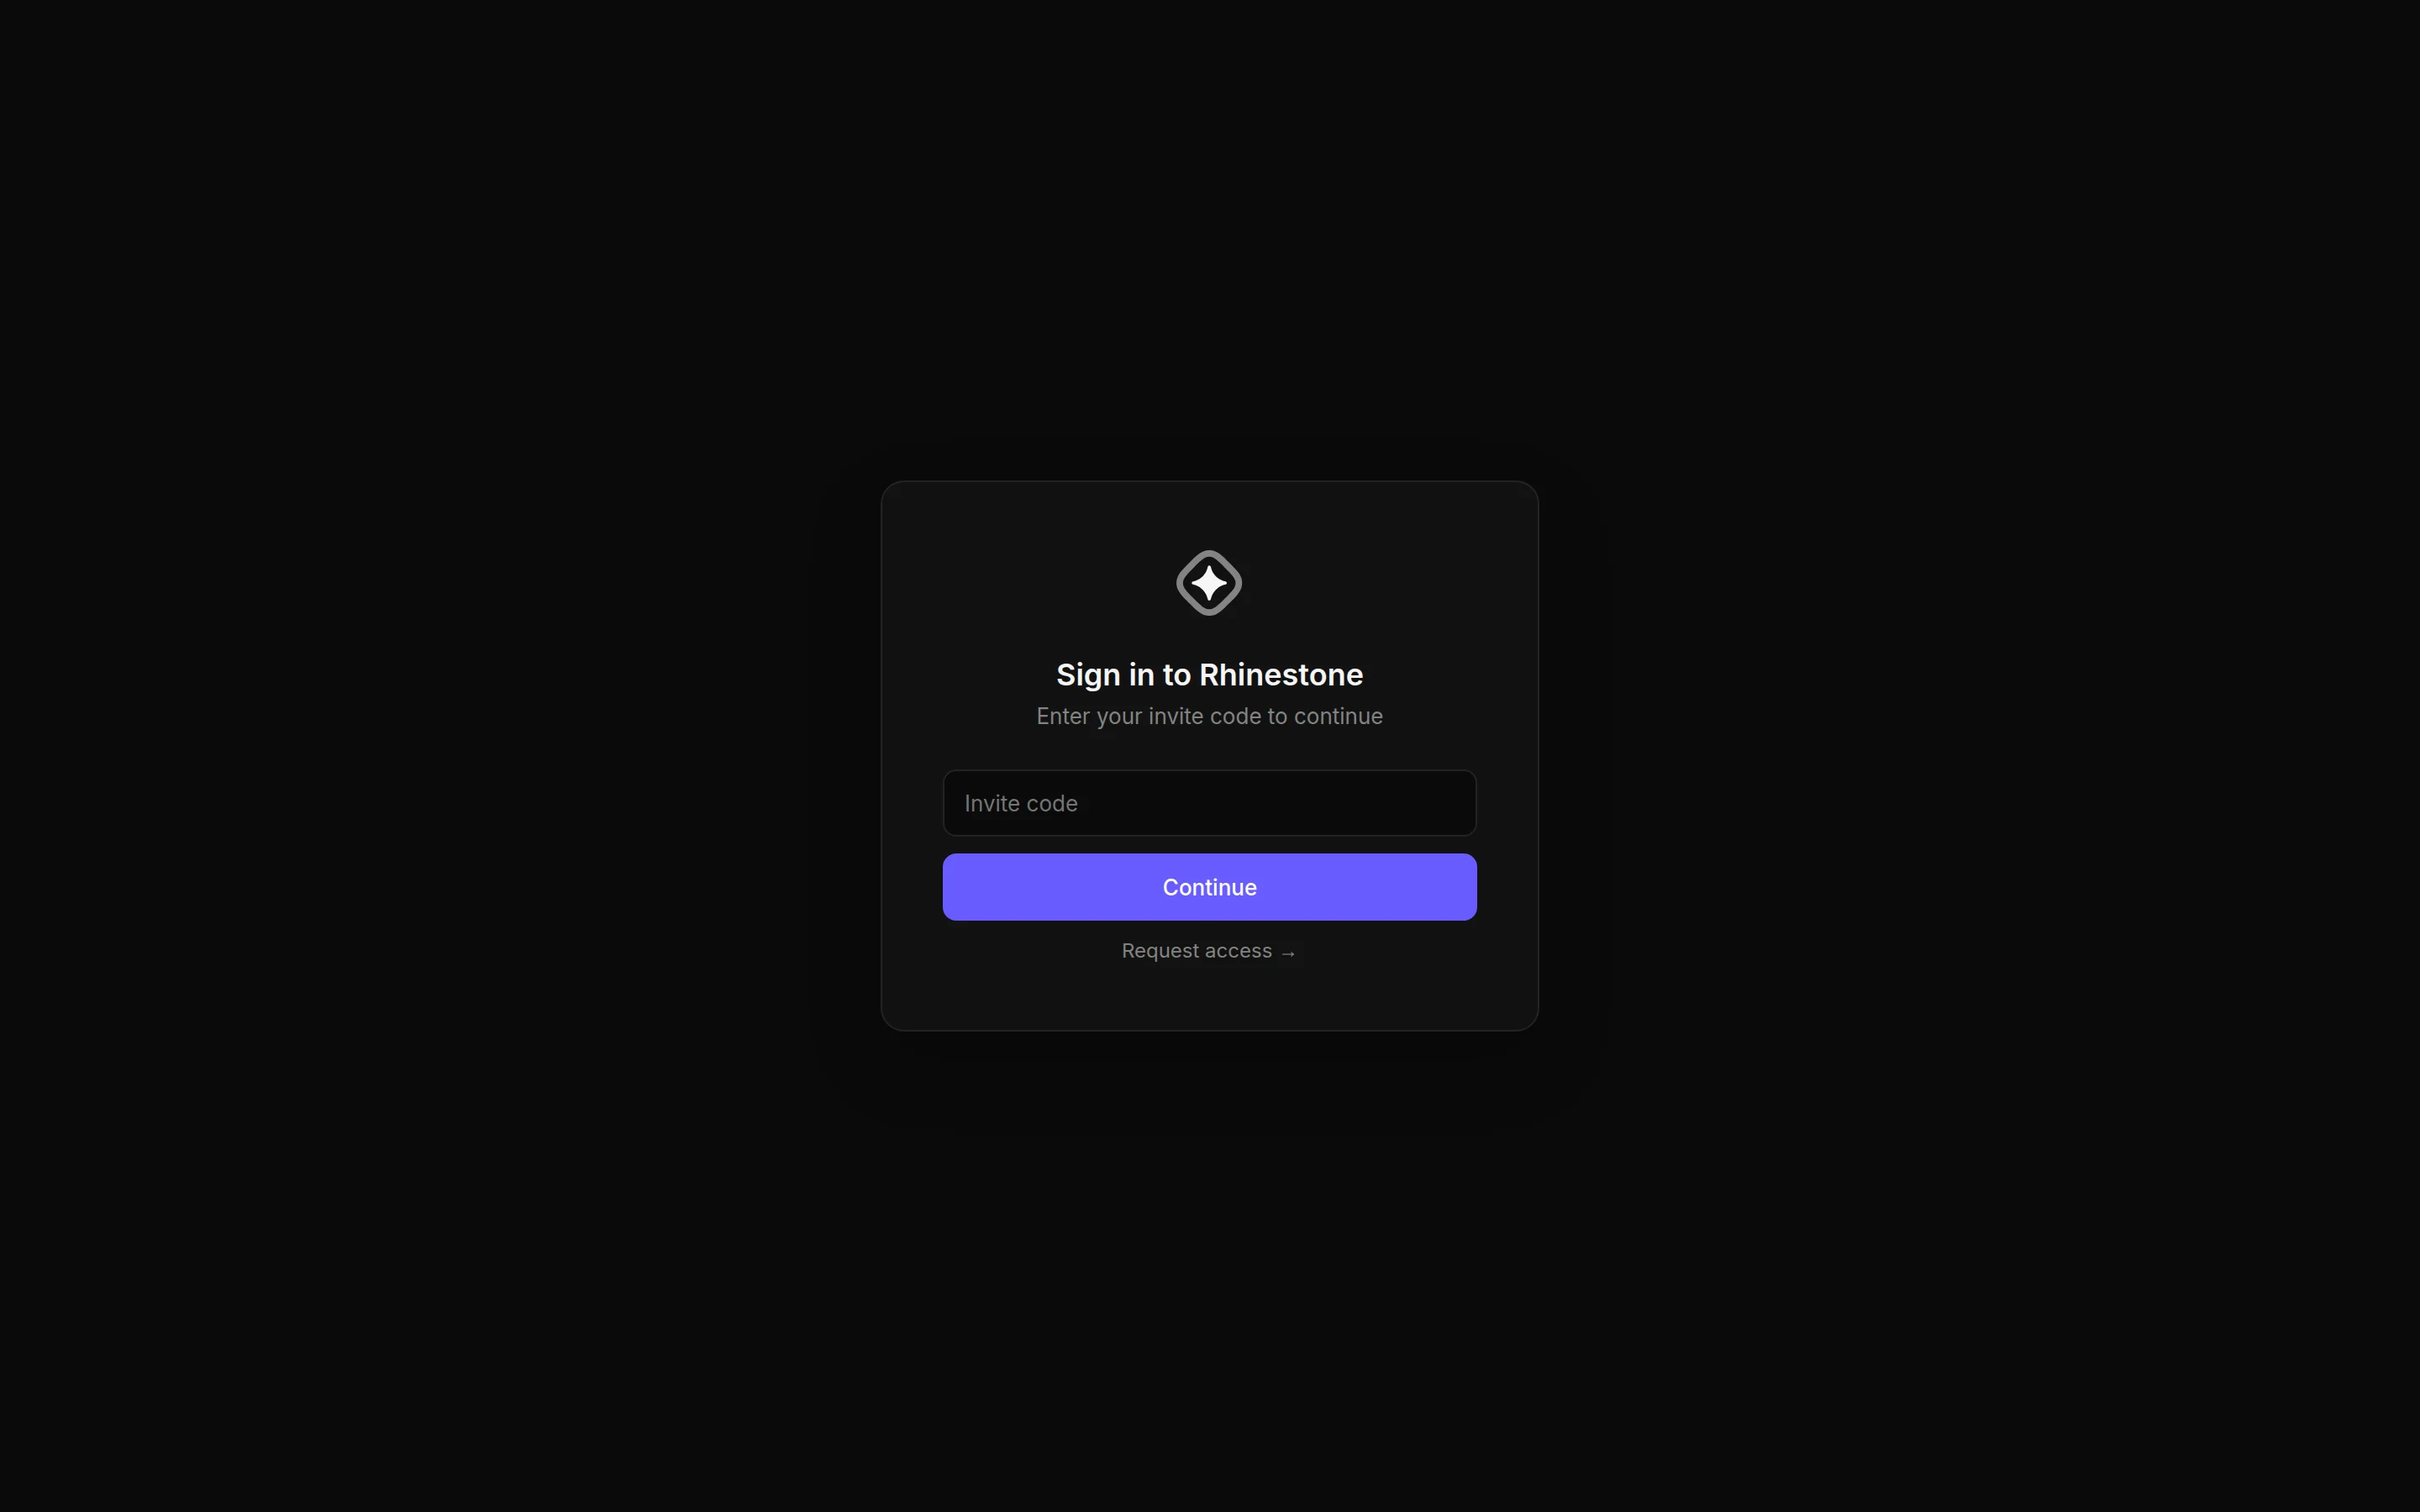 After the code is accepted, authenticate with Google or GitHub.
Accept a pending team invitation, or create a team and optionally invite teammates during onboarding.
Use the project switcher at the top of the sidebar. Intents, deposits, credentials, sponsorship controls, and app-fee data use the selected project.
Each user can belong to one organization. If you need to move an existing account to another organization, [contact Rhinestone](https://www.rhinestone.dev/contact).
## Navigate the dashboard
The sidebar provides these sections:
* [**Overview**](https://dashboard.rhinestone.dev/overview) — view intent and deposit volume, active users, app-fee revenue, and sponsorship spend. This section appears only where metrics are enabled.
* [**Intents**](https://dashboard.rhinestone.dev/intents) — inspect submitted intents and their execution details.
* [**Deposits**](https://dashboard.rhinestone.dev/deposits) — inspect deposits, configure deposit behavior, and retry or refund eligible failures.
* [**API keys**](https://dashboard.rhinestone.dev/keys) — manage API keys and [JWT signing keys](https://dashboard.rhinestone.dev/keys/jwt) for the selected project.
* [**1auth**](https://dashboard.rhinestone.dev/oneauth) — [register embedded-wallet apps and domains](#register-a-1auth-app) and inspect attributed users where 1auth is enabled.
* **Settings** — manage the [team](https://dashboard.rhinestone.dev/settings), [sponsorship](https://dashboard.rhinestone.dev/settings/sponsorship), [app fees](https://dashboard.rhinestone.dev/settings/app-fees), and [activity history](https://dashboard.rhinestone.dev/settings/activity).
If the selected project has no API key, the dashboard opens its getting-started flow instead of the normal landing page.
## Manage API keys
API keys are long-lived project credentials. Keep them on your backend and never include one in browser or mobile application code. Owners and admins can create, rename, scope, and revoke keys; operators and members can inspect them without changing them.
### Create a key
1. Open [**API keys**](https://dashboard.rhinestone.dev/keys) and select **Create key**.
2. Enter a name that identifies the environment or service using it.
3. Copy the key and store it in a secret manager before closing the dialog.
The full API key is shown only once. It cannot be recovered from the
dashboard.
A project can have up to 10 active API keys.
### Restrict a key
New keys allow mainnets and default to **Write** for each product scope. Open a key, adjust **Scopes**, then select **Save scopes**.
After the code is accepted, authenticate with Google or GitHub.
Accept a pending team invitation, or create a team and optionally invite teammates during onboarding.
Use the project switcher at the top of the sidebar. Intents, deposits, credentials, sponsorship controls, and app-fee data use the selected project.
Each user can belong to one organization. If you need to move an existing account to another organization, [contact Rhinestone](https://www.rhinestone.dev/contact).
## Navigate the dashboard
The sidebar provides these sections:
* [**Overview**](https://dashboard.rhinestone.dev/overview) — view intent and deposit volume, active users, app-fee revenue, and sponsorship spend. This section appears only where metrics are enabled.
* [**Intents**](https://dashboard.rhinestone.dev/intents) — inspect submitted intents and their execution details.
* [**Deposits**](https://dashboard.rhinestone.dev/deposits) — inspect deposits, configure deposit behavior, and retry or refund eligible failures.
* [**API keys**](https://dashboard.rhinestone.dev/keys) — manage API keys and [JWT signing keys](https://dashboard.rhinestone.dev/keys/jwt) for the selected project.
* [**1auth**](https://dashboard.rhinestone.dev/oneauth) — [register embedded-wallet apps and domains](#register-a-1auth-app) and inspect attributed users where 1auth is enabled.
* **Settings** — manage the [team](https://dashboard.rhinestone.dev/settings), [sponsorship](https://dashboard.rhinestone.dev/settings/sponsorship), [app fees](https://dashboard.rhinestone.dev/settings/app-fees), and [activity history](https://dashboard.rhinestone.dev/settings/activity).
If the selected project has no API key, the dashboard opens its getting-started flow instead of the normal landing page.
## Manage API keys
API keys are long-lived project credentials. Keep them on your backend and never include one in browser or mobile application code. Owners and admins can create, rename, scope, and revoke keys; operators and members can inspect them without changing them.
### Create a key
1. Open [**API keys**](https://dashboard.rhinestone.dev/keys) and select **Create key**.
2. Enter a name that identifies the environment or service using it.
3. Copy the key and store it in a secret manager before closing the dialog.
The full API key is shown only once. It cannot be recovered from the
dashboard.
A project can have up to 10 active API keys.
### Restrict a key
New keys allow mainnets and default to **Write** for each product scope. Open a key, adjust **Scopes**, then select **Save scopes**.
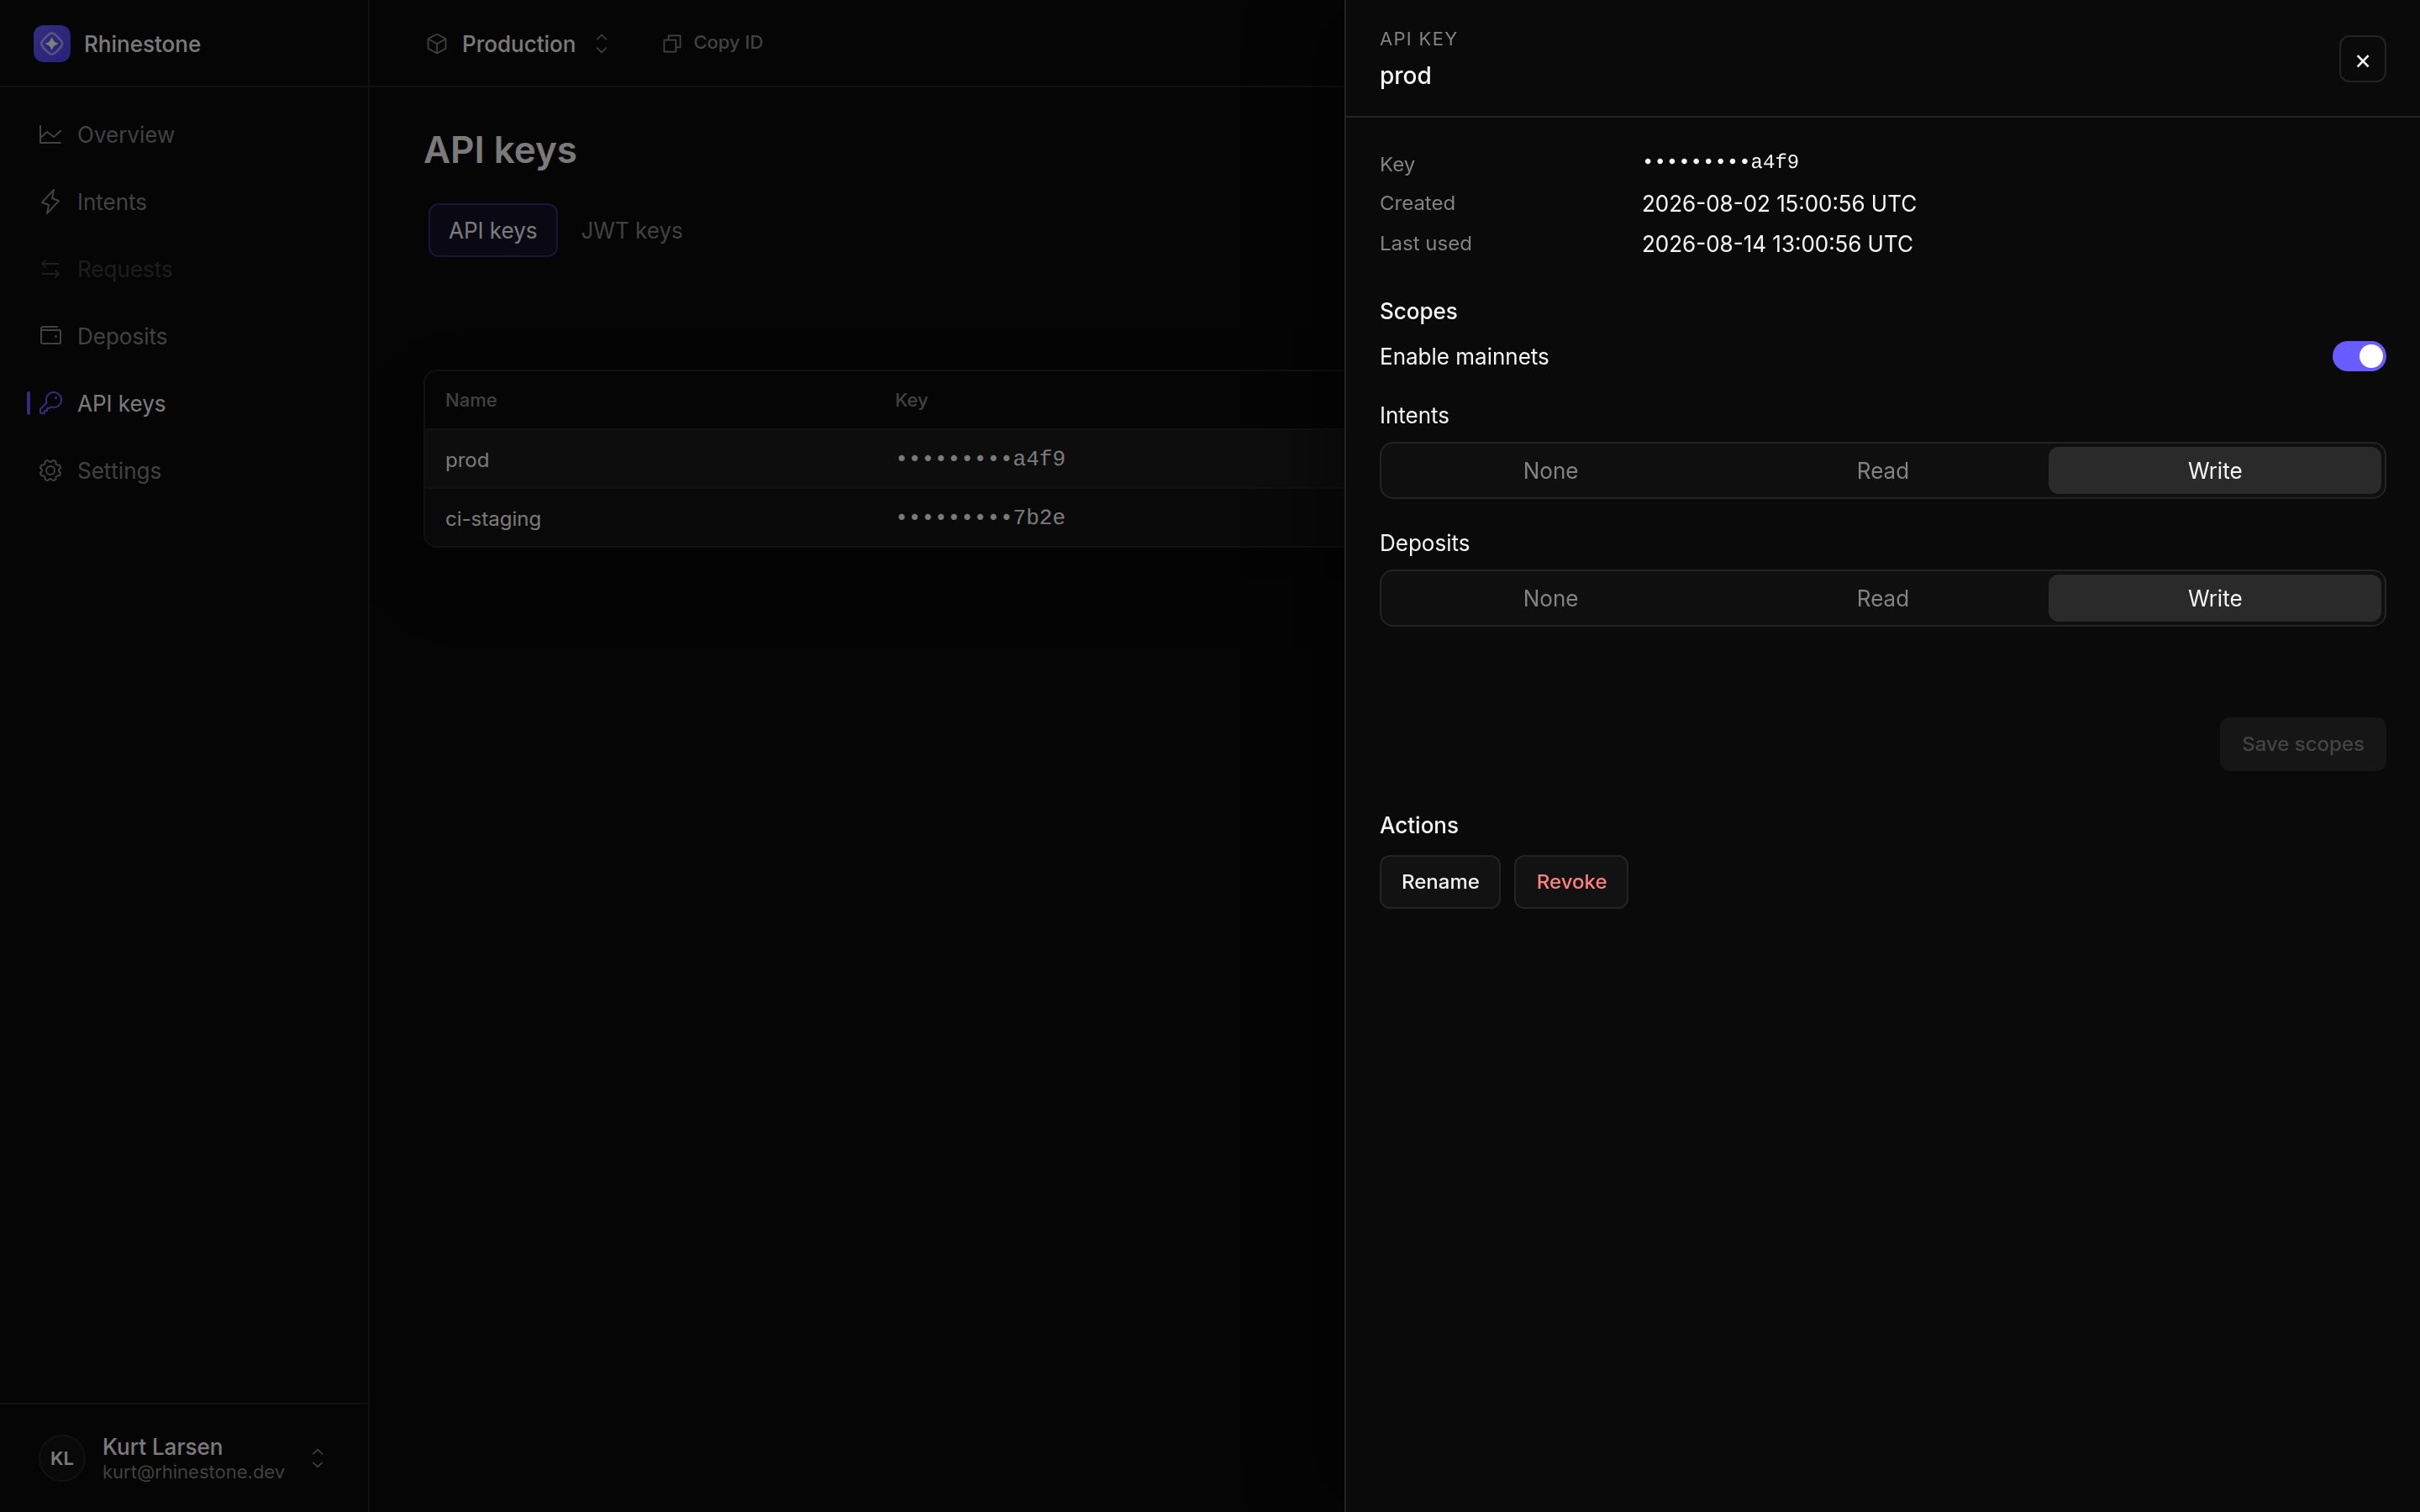 | Control | Values |
| --------------- | ----------------------------------------------------------------------------------------------------------------------------------- |
| Enable mainnets | Turn off to reject requests that target mainnets. |
| Intents | **None** blocks intent endpoints, **Read** allows reads and quotes, and **Write** also allows submission. |
| Deposits | **None** blocks deposit endpoints, **Read** allows deposit reads, and **Write** also allows mutations. |
| 1auth | **None** blocks 1auth project routes, **Read** allows application and user reads, and **Write** also allows application management. |
Apply least privilege separately to every key. Scope changes take effect without changing the key value.
### Rotate or revoke a key
API keys do not rotate in place:
1. Create and securely store a replacement.
2. Deploy the replacement to every caller.
3. Confirm traffic uses the replacement.
4. Open the old key and select **Revoke**.
Both keys remain valid during the overlap. Renaming a key changes only its dashboard label.
## Manage JWT signing keys
JWT authentication lets your backend issue short-lived credentials instead of distributing an API key to a client. Register only the public signing key with Rhinestone; the private key stays on your backend.
Owners and admins manage these keys on the [**JWT keys** screen](https://dashboard.rhinestone.dev/keys/jwt).
1. Select **Register key**, then **Generate keypair**.
2. Enter an **Integrator ID** and **Key ID**.
3. Create the key and download the private JWK.
4. Store the private JWK in a backend secret manager before closing the dialog.
| Control | Values |
| --------------- | ----------------------------------------------------------------------------------------------------------------------------------- |
| Enable mainnets | Turn off to reject requests that target mainnets. |
| Intents | **None** blocks intent endpoints, **Read** allows reads and quotes, and **Write** also allows submission. |
| Deposits | **None** blocks deposit endpoints, **Read** allows deposit reads, and **Write** also allows mutations. |
| 1auth | **None** blocks 1auth project routes, **Read** allows application and user reads, and **Write** also allows application management. |
Apply least privilege separately to every key. Scope changes take effect without changing the key value.
### Rotate or revoke a key
API keys do not rotate in place:
1. Create and securely store a replacement.
2. Deploy the replacement to every caller.
3. Confirm traffic uses the replacement.
4. Open the old key and select **Revoke**.
Both keys remain valid during the overlap. Renaming a key changes only its dashboard label.
## Manage JWT signing keys
JWT authentication lets your backend issue short-lived credentials instead of distributing an API key to a client. Register only the public signing key with Rhinestone; the private key stays on your backend.
Owners and admins manage these keys on the [**JWT keys** screen](https://dashboard.rhinestone.dev/keys/jwt).
1. Select **Register key**, then **Generate keypair**.
2. Enter an **Integrator ID** and **Key ID**.
3. Create the key and download the private JWK.
4. Store the private JWK in a backend secret manager before closing the dialog.
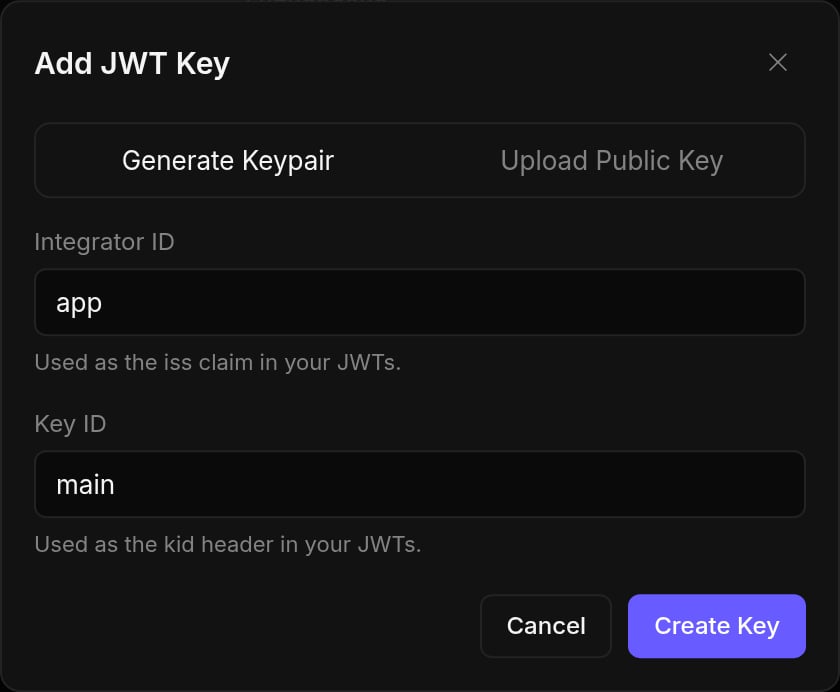 The dashboard generates an ES256 key on the P-256 curve in your browser. Only the public key is registered. The private key is shown once and cannot be recovered.
1. Select **Register key**, then choose the public-key upload option.
2. Enter an **Integrator ID** and **Key ID**.
3. Paste a public JWK or upload a `.json` file.
4. Create the key.
The dashboard accepts RSA keys for RS256 and EC P-256 keys for ES256. It rejects a JWK that contains private key material.
The identifiers map to the tokens your backend signs:
| Dashboard value | JWT field |
| --------------- | ---------------------- |
| Integrator ID | `iss` claim |
| Key ID | `kid` protected header |
| Project ID | `sub` claim |
For JWT architecture and signing examples, see [Custom signer security](/wallets/custom-signer/integration/security). For embedded-wallet sponsorship claims, see [Sponsorship setup](/transactions/sponsorship/set-up).
### Rotate or disable a JWT key
Register a new public key under a new Key ID, start signing with its private key, and wait for tokens signed by the old key to expire. Then open the old key and select **Disable**. Tokens using a disabled key no longer verify.
## Register a 1auth app
Register your application in the selected Dashboard project before [setting up an embedded wallet](/wallets/embedded-wallets/accounts).
The **1auth** section appears only in environments where it is enabled. If it is missing, [contact Rhinestone](https://www.rhinestone.dev/contact) to confirm availability. Owners, admins, and operators can manage apps and domains; members have read-only access.
### Create an app and verify domains
Open [**1auth Apps**](https://dashboard.rhinestone.dev/oneauth), select **Create App**, enter a **Name**, and submit. Open the new app's row to view its **Client ID**, domains, and WebAuthn configuration.
Under **Domains**, select **Add domain** and enter the host name, such as `app.example.com`, without a scheme, path, or port.
For a shared RP ID such as `example.com`, add both `example.com` and every host name that will run WebAuthn, such as `app.example.com` and `checkout.example.com`. Each must be registered and verified separately; verifying a parent does not verify its subdomains.
Copy the **Name** and **Value** from the displayed **TXT** record into your DNS provider. Use the values shown for that domain, not a record copied from another app or environment. If your DNS provider appends the zone name automatically, enter only the relative record name it requires.
Select **Done** if DNS is not ready yet. The pending domain retains its verification instructions in the app drawer.
Once the TXT record is publicly resolvable, select **Verify now**, or return to the app drawer and select **Verify** beside the domain. Confirm that the domain's status changes from **pending** to **active**.
If verification fails, check the record name and value and allow time for DNS propagation before retrying. If attempts are rate-limited, wait for the interval shown by the Dashboard.
### Configure the RP ID and authorized origins
Choose the passkey namespace before onboarding users. For one host, use its host name as the RP ID. To share a namespace across subdomains, use their parent domain.
An established RP ID cannot be changed or cleared in the Dashboard. A different RP ID selects a different passkey, on-chain signer, and smart-account namespace; existing balances do not move automatically. Treat any change as an explicit account migration, not a configuration update.
1. In the app drawer, find **WebAuthn RP namespace** and select **Configure**.
2. Select a verified domain under **RP ID**. Only exact, verified domains are eligible; a wildcard domain cannot back this configuration.
3. In **Ceremony origins**, enter every authorized HTTPS origin, one per line.
4. Select **Save configuration**. For an existing RP ID, use **Edit origins** to update the origin list without changing the RP ID.
The dashboard generates an ES256 key on the P-256 curve in your browser. Only the public key is registered. The private key is shown once and cannot be recovered.
1. Select **Register key**, then choose the public-key upload option.
2. Enter an **Integrator ID** and **Key ID**.
3. Paste a public JWK or upload a `.json` file.
4. Create the key.
The dashboard accepts RSA keys for RS256 and EC P-256 keys for ES256. It rejects a JWK that contains private key material.
The identifiers map to the tokens your backend signs:
| Dashboard value | JWT field |
| --------------- | ---------------------- |
| Integrator ID | `iss` claim |
| Key ID | `kid` protected header |
| Project ID | `sub` claim |
For JWT architecture and signing examples, see [Custom signer security](/wallets/custom-signer/integration/security). For embedded-wallet sponsorship claims, see [Sponsorship setup](/transactions/sponsorship/set-up).
### Rotate or disable a JWT key
Register a new public key under a new Key ID, start signing with its private key, and wait for tokens signed by the old key to expire. Then open the old key and select **Disable**. Tokens using a disabled key no longer verify.
## Register a 1auth app
Register your application in the selected Dashboard project before [setting up an embedded wallet](/wallets/embedded-wallets/accounts).
The **1auth** section appears only in environments where it is enabled. If it is missing, [contact Rhinestone](https://www.rhinestone.dev/contact) to confirm availability. Owners, admins, and operators can manage apps and domains; members have read-only access.
### Create an app and verify domains
Open [**1auth Apps**](https://dashboard.rhinestone.dev/oneauth), select **Create App**, enter a **Name**, and submit. Open the new app's row to view its **Client ID**, domains, and WebAuthn configuration.
Under **Domains**, select **Add domain** and enter the host name, such as `app.example.com`, without a scheme, path, or port.
For a shared RP ID such as `example.com`, add both `example.com` and every host name that will run WebAuthn, such as `app.example.com` and `checkout.example.com`. Each must be registered and verified separately; verifying a parent does not verify its subdomains.
Copy the **Name** and **Value** from the displayed **TXT** record into your DNS provider. Use the values shown for that domain, not a record copied from another app or environment. If your DNS provider appends the zone name automatically, enter only the relative record name it requires.
Select **Done** if DNS is not ready yet. The pending domain retains its verification instructions in the app drawer.
Once the TXT record is publicly resolvable, select **Verify now**, or return to the app drawer and select **Verify** beside the domain. Confirm that the domain's status changes from **pending** to **active**.
If verification fails, check the record name and value and allow time for DNS propagation before retrying. If attempts are rate-limited, wait for the interval shown by the Dashboard.
### Configure the RP ID and authorized origins
Choose the passkey namespace before onboarding users. For one host, use its host name as the RP ID. To share a namespace across subdomains, use their parent domain.
An established RP ID cannot be changed or cleared in the Dashboard. A different RP ID selects a different passkey, on-chain signer, and smart-account namespace; existing balances do not move automatically. Treat any change as an explicit account migration, not a configuration update.
1. In the app drawer, find **WebAuthn RP namespace** and select **Configure**.
2. Select a verified domain under **RP ID**. Only exact, verified domains are eligible; a wildcard domain cannot back this configuration.
3. In **Ceremony origins**, enter every authorized HTTPS origin, one per line.
4. Select **Save configuration**. For an existing RP ID, use **Edit origins** to update the origin list without changing the RP ID.
 For an application served from two subdomains:
| Field | Value |
| ---------------- | ------------------------------------------------------------------------------- |
| Verified domains | `example.com`, `app.example.com`, `checkout.example.com` |
| RP ID | `example.com` |
| Ceremony origins | `https://app.example.com` and `https://checkout.example.com`, on separate lines |
An origin includes the scheme and any non-default port, but no path, query, or fragment. Its host name must equal the RP ID or be its subdomain, and must itself be an exact verified domain on this app. Wildcard origins are not accepted. For example, `https://app.example.com:8443` is a different origin from `https://app.example.com` and must be listed separately if used.
### Connect the client
Copy the app's **Client ID** into `clientId` in the shared [client initializer](/wallets/embedded-wallets/accounts#initialize-the-client). It identifies the app; it is not a project API key or JWT signing secret. Keep those credentials on your backend.
Saving an RP ID and ceremony origins authorizes that namespace on the server; it does not activate it in the client. Set the matching `webauthn.rpId` using [Passkeys and domains](/wallets/embedded-wallets/passkeys-and-domains#share-an-account-across-subdomains). Without that option, the SDK keeps exact-host isolation. `rpOrigins` is server configuration, not an SDK option.
Before onboarding users, authenticate from each deployed origin and confirm that hosts intended to share an account return the same account address. Use the [sponsorship setup](/transactions/sponsorship/set-up) separately for transaction funding and backend token endpoints.
## Manage the team
Manage organization access on the Dashboard's [**Team** screen](https://dashboard.rhinestone.dev/settings).
| Role | Access |
| -------- | -------------------------------------------------------------------------------------- |
| Owner | Manages the organization, roles, members, credentials, and configuration. |
| Admin | Manages credentials and configuration, and can invite or remove members and operators. |
| Operator | Includes Member access, refunds eligible deposits, and manages 1auth apps and domains. |
| Member | Can view dashboard resources and retry eligible deposits. |
### Invite a teammate
1. Select **Invite member**.
2. Enter the teammate's email address.
3. Choose a role and select **Send invite**.
Owners can invite admins, operators, and members. Admins can invite operators and members. A pending invitation can be resent from the team list.
Only owners can change roles. Owners can remove any non-owner; admins can remove operators and members.
## Sponsorship and monetization
The dashboard exposes these controls under **Settings**, but their procedures live with the products they configure:
* Use [Sponsorship setup](/transactions/sponsorship/set-up) for card billing and credits, and [Policies and security](/transactions/sponsorship/policies-and-security) for spending controls.
* Use [Monetization setup](/transactions/monetization/set-up) and [Monetize the flow](/transactions/monetization/monetize-the-flow) for app-fee collection, payout destinations, balances, and withdrawals.
This page does not duplicate those procedures so their limits and commercial behavior have one source of truth.
For an application served from two subdomains:
| Field | Value |
| ---------------- | ------------------------------------------------------------------------------- |
| Verified domains | `example.com`, `app.example.com`, `checkout.example.com` |
| RP ID | `example.com` |
| Ceremony origins | `https://app.example.com` and `https://checkout.example.com`, on separate lines |
An origin includes the scheme and any non-default port, but no path, query, or fragment. Its host name must equal the RP ID or be its subdomain, and must itself be an exact verified domain on this app. Wildcard origins are not accepted. For example, `https://app.example.com:8443` is a different origin from `https://app.example.com` and must be listed separately if used.
### Connect the client
Copy the app's **Client ID** into `clientId` in the shared [client initializer](/wallets/embedded-wallets/accounts#initialize-the-client). It identifies the app; it is not a project API key or JWT signing secret. Keep those credentials on your backend.
Saving an RP ID and ceremony origins authorizes that namespace on the server; it does not activate it in the client. Set the matching `webauthn.rpId` using [Passkeys and domains](/wallets/embedded-wallets/passkeys-and-domains#share-an-account-across-subdomains). Without that option, the SDK keeps exact-host isolation. `rpOrigins` is server configuration, not an SDK option.
Before onboarding users, authenticate from each deployed origin and confirm that hosts intended to share an account return the same account address. Use the [sponsorship setup](/transactions/sponsorship/set-up) separately for transaction funding and backend token endpoints.
## Manage the team
Manage organization access on the Dashboard's [**Team** screen](https://dashboard.rhinestone.dev/settings).
| Role | Access |
| -------- | -------------------------------------------------------------------------------------- |
| Owner | Manages the organization, roles, members, credentials, and configuration. |
| Admin | Manages credentials and configuration, and can invite or remove members and operators. |
| Operator | Includes Member access, refunds eligible deposits, and manages 1auth apps and domains. |
| Member | Can view dashboard resources and retry eligible deposits. |
### Invite a teammate
1. Select **Invite member**.
2. Enter the teammate's email address.
3. Choose a role and select **Send invite**.
Owners can invite admins, operators, and members. Admins can invite operators and members. A pending invitation can be resent from the team list.
Only owners can change roles. Owners can remove any non-owner; admins can remove operators and members.
## Sponsorship and monetization
The dashboard exposes these controls under **Settings**, but their procedures live with the products they configure:
* Use [Sponsorship setup](/transactions/sponsorship/set-up) for card billing and credits, and [Policies and security](/transactions/sponsorship/policies-and-security) for spending controls.
* Use [Monetization setup](/transactions/monetization/set-up) and [Monetize the flow](/transactions/monetization/monetize-the-flow) for app-fee collection, payout destinations, balances, and withdrawals.
This page does not duplicate those procedures so their limits and commercial behavior have one source of truth.